

As a food blogger or hobbyist, capturing visually appealing flat lays of your dishes is essential for showcasing your culinary creations and engaging with your audience. However, achieving high-quality photos can be challenging, especially when working with limited budgets and resources. In this article, we'll explore the fundamentals of creating stunning natural light flat lays using your smartphone and simple setups.
What is Natural Light Flat Lay Photography?
Natural light flat lay photography involves capturing a flat composition of dishes, ingredients, or other food-related items using natural light sources. This technique requires minimal equipment and can produce stunning results when executed correctly. By harnessing the power of sunlight, you'll be able to create visually appealing images that are not only cost-effective but also easy to set up.
Benefits of Natural Light Flat Lay Photography
Cost-Effective
One of the primary benefits of natural light flat lay photography is its cost-effectiveness. Unlike traditional studio lighting setups, which can be expensive and cumbersome, natural light requires minimal equipment and is often readily available at no additional cost. This makes it an ideal option for food bloggers, hobbyists, and professionals alike.
Easy to Set Up
Another advantage of natural light flat lay photography is its ease of setup. With a smartphone and a basic understanding of lighting principles, you'll be able to create stunning images in just a matter of minutes. Whether you're working on location or in a studio, the flexibility of this technique allows for quick and easy setup.
Versatile
Natural light flat lay photography is also incredibly versatile. From still-life compositions to action shots, this technique can be applied to a wide range of food photography styles. By experimenting with different angles, lighting setups, and props, you'll be able to create unique and captivating images that showcase your culinary creations in the best possible light.
Essential Smartphone Props for Food Photography
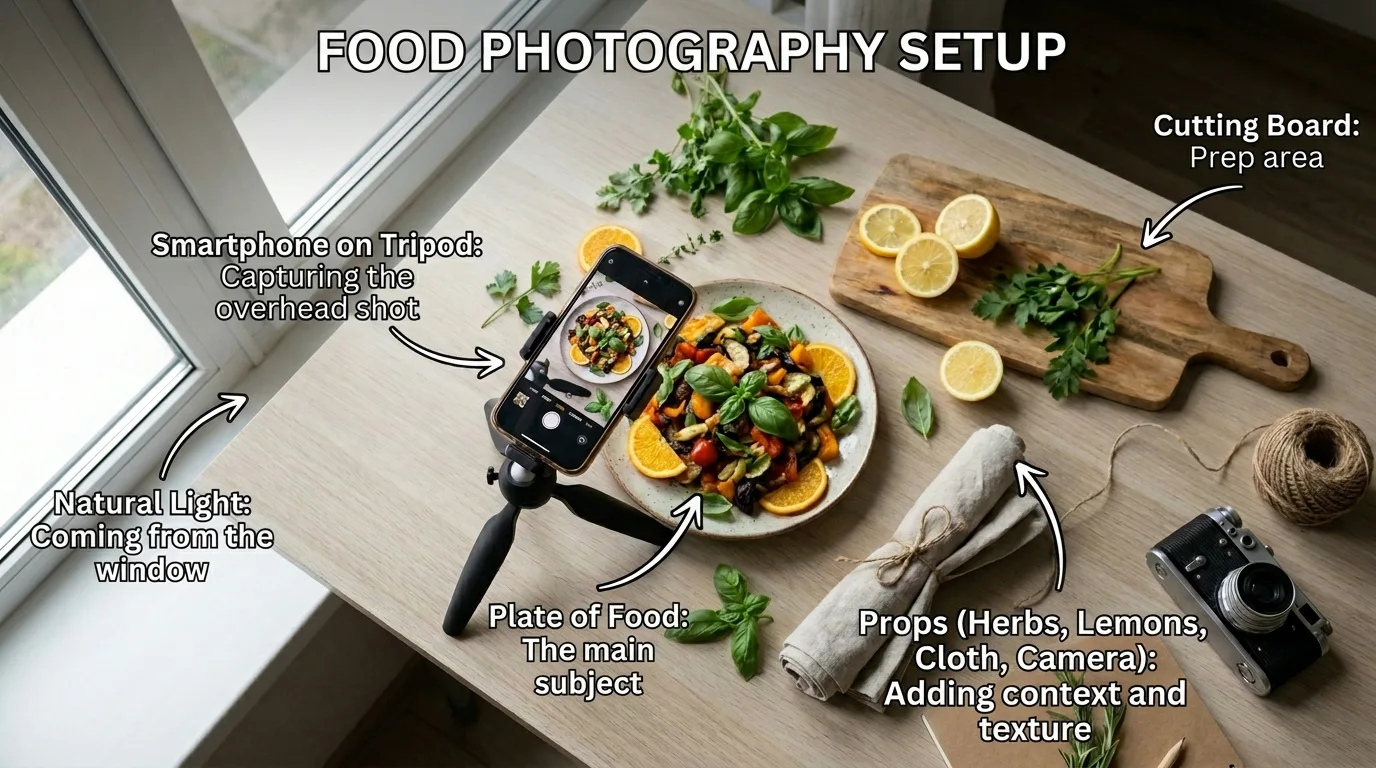
When it comes to smartphone props for food photography, simplicity is key. You'll want to focus on using items that complement the dish and add visual interest without overpowering the subject. Here are some recommended props to get you started:
Fresh Herbs
Fresh herbs like basil, rosemary, or thyme can add a pop of color and fragrance to your images. Consider using them as a garnish or incorporating them into the composition for added depth.
Fruits or Vegetables
Sliced citrus fruits, berries, or leafy greens make great additions to your flat lays. Use them to create a visually appealing arrangement or incorporate them into the dish itself.
Wooden Boards or Slates
Add texture and warmth to your composition with wooden boards or slates. These can be used as a background or incorporated into the setup for added depth.
Twine or Jute String
Use twine or jute string as a rustic accent or to tie together ingredients. This simple prop can add a touch of whimsy and personality to your images.
Setting Up Your Natural Light Flat Lay
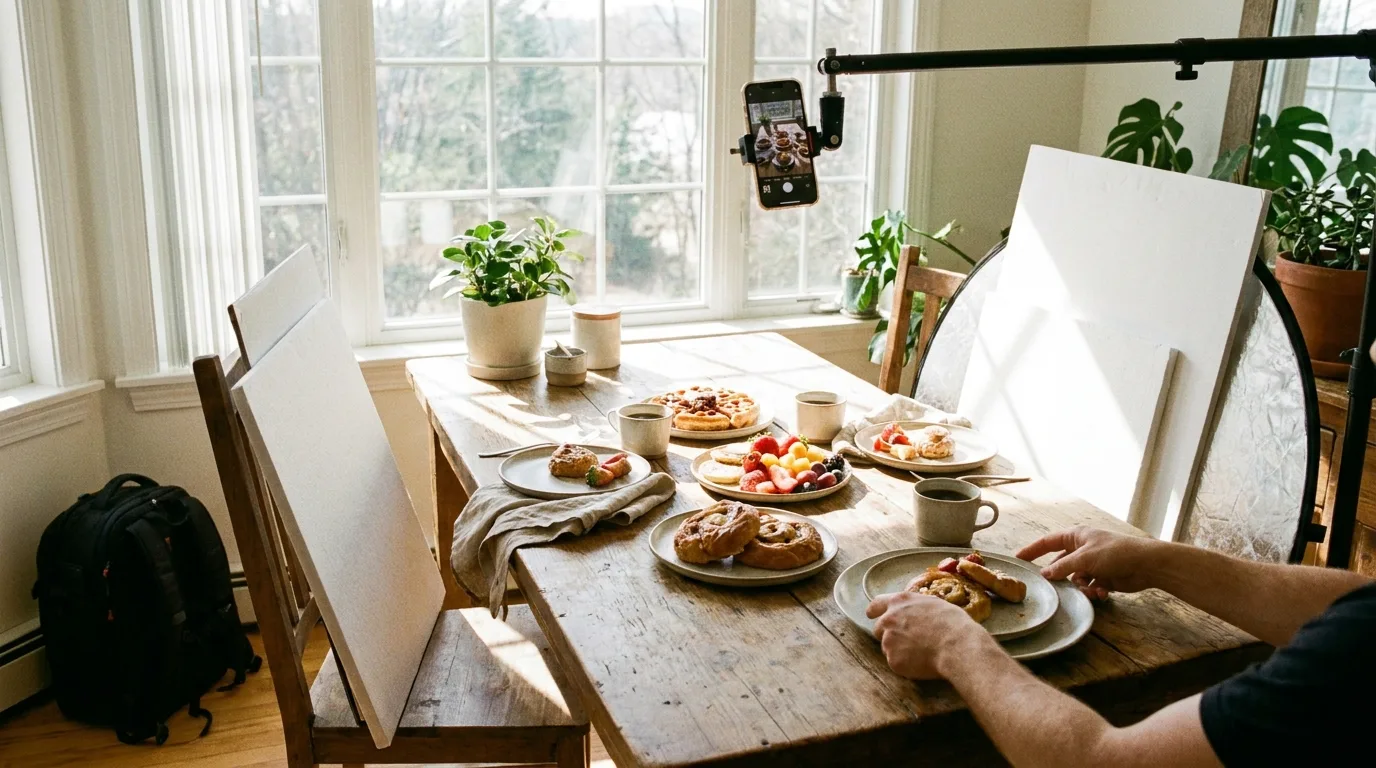
To create an effective natural light setup, follow these steps:
1. Choose a location with plenty of natural light: East- or west-facing windows are ideal for soft, gentle light. Avoid direct sunlight, which can create harsh shadows and unflattering lighting.
2. Select a background: Use a plain white or light-colored surface to reflect light and reduce shadows. Consider using a textured background like wood or stone to add depth.
3. Arrange your composition: Balance your dish with complementary ingredients or props. Leave negative space to create visual breathing room.
Tips for Working with Natural Light
Natural light can be unpredictable, but with these tips, you'll be better equipped to handle its challenges:
Shoot during the golden hour
The golden hour, typically occurring just before sunset, provides soft, warm light perfect for capturing delicate details. This is an ideal time to shoot your flat lays.
Use a diffuser or translucent material
Softening harsh shadows and reducing reflections can be achieved with a diffuser or translucent material. Experiment with different materials to find the one that works best for you.
Experiment with angles and compositions
Don't be afraid to try new perspectives! Natural light photography is all about experimentation, so don't be afraid to try different angles and compositions to create unique images.
Smartphone Settings for Natural Light Photography
To capture stunning natural light flat lays with your smartphone, experiment with these camera settings:
High contrast mode
Enhance details in both bright and dark areas by using high contrast mode. This setting can help bring out the texture and depth of your dishes.
HDR (High Dynamic Range)
Combine multiple exposures to achieve greater depth and detail with HDR. This setting is ideal for capturing a wide range of tonal values in your images.
ISO adjustment
Lowering the ISO value can reduce noise and improve low-light performance. Experiment with different settings to find the one that works best for you.
Tips for Post-Processing
While natural light photography is all about capturing beautiful, unedited images, there are some post-processing techniques you can use to enhance your photos:
Adjust exposure and contrast
Use software like Lightroom or Photoshop to adjust the exposure and contrast of your images. This will help bring out the details in your dishes.
Crop and straighten
Crop and straighten your images as needed. This will help create a clean, polished look for your flat lays.
Conclusion
Natural light flat lay photography is an incredibly versatile technique that can be applied to a wide range of food photography styles. By mastering the basics of lighting, composition, and post-processing, you'll be able to capture stunning images that showcase your culinary creations in the best possible light. Experiment with different props, angles, and settings to find what works best for you, and don't be afraid to try new things! With practice and patience, you'll become a natural light photography pro in no time.
Resources
National Geographic: "How to Take Better Food Photos"
The Spruce Eats: "Food Photography Tips and Tricks"
Lightroom: "Natural Light Photography Tutorial"
This Article was made with AI assistance and human editing.